
Move your pointer over the image to zoom in
Complete Product Overview
Galvanised and stainless steel earth pipe (pipe electrode for earth pits)
Order Code: HGV 3 · HGV 6 · HSL 3 · HSL 6 · HSM 3 · HSM 6
Last updated:
The galvanised earth pipe from KALOT Group is a tubular earth electrode for vertical installation in a deep earth pit, and we offer it in hot-dip galvanised steel and in 304L and 316 stainless steel. The pipe has a nominal size of 3 inches and comes in two lengths, 3 and 6 m. A two-hole tab welded to the outer wall at its top end takes a two-hole copper cable lug. The pipe's large contact area with the soil and its deep installation, together with the column of GIM at the bottom of the pit, create a large electrode in the moist layer of the soil: an answer for land where the top layer is dry and the moisture lies deep.
Our installation method is simple and clear. A pit 40 to 60 cm in diameter and at least 6 m deep is dug, and its lower 3 to 4 m is filled with GIM ground improvement material. The 6 m pipe stands upright inside, with its top end just below the floor of the concrete inspection pit or polyethylene inspection pit. Inside the inspection pit, a short bare copper conductor connects the pipe tab to the pit's earth bar, and for this pipe we recommend the tinned copper earth bar. In the second method, the 3 m pipe is lowered to the bottom of the pit on its own conductor, GIM covers the whole pipe and 15 cm above it, and the conductor rises through the pit to the earth bar. We have compared the earth pipe in technical and financial terms with the galvanised earth rod, the copper-bonded earth rod and the copper earth pit plate.
Earth pipe: a tubular electrode for deep earth pits
The earth pipe takes the earth electrode down to depth. Where the top layer of soil is dry, the moisture lies deep and driving an earth rod to that depth is not practical, we install the pipe in a pit at least 6 m deep, set in GIM. You get the pipe, GIM, concrete or polyethylene inspection pit, tinned copper earth bar, cable lug and copper conductor all from us, so your earth pit goes in as one complete, inspectable system.
- Hot-dip galvanised steel or 304L and 316 stainless steel; nominal size 3 inches
- Two lengths, 3 and 6 m, in each material
- Two-hole tab welded to the outer wall of the pipe, for a two-hole copper cable lug
- Installed in a pit 40 to 60 cm in diameter and at least 6 m deep, with GIM and an earth inspection pit
3-inch pipe, galvanised or stainless steel
A steel pipe with an 83 mm outer diameter and a tab welded to the outer wall at its top end: galvanised pipe with a 4 mm wall, hot-dip galvanised after welding, with a zinc coating of at least 85 microns, or 304L and 316 stainless steel with a 3 mm wall.
A pit at least 6 m deep, with GIM
The pipe stands in a pit 40 to 60 cm in diameter and at least 6 m deep. For a 6 m pipe, the lower 3 to 4 m of the pit, under and around the lower end of the pipe, is filled with GIM. The GIM column becomes part of the electrode and brings down the resistance of the earth pit.
For dry ground with deep moisture
Where the top layer of soil dries out in summer and an earth rod cannot be driven down to the moist layer, one pipe in one deep pit does the work of the earth electrode.
Two-hole tab, an inspectable connection
The bare copper conductor is fastened to the pipe tab with a two-hole copper cable lug and stainless steel bolts, nuts and washers, and the joint is wrapped in insulating tape. This joint sits in the open base of the earth inspection pit and the conductor connects to the tinned copper earth bar inside the pit, so both stay accessible for inspection and measurement.
Six drawings, a three-dimensional view and a datasheet
Earth pipe datasheet (PDF)See the dimensional drawing, exploded view, installation schematic, installation steps, connection modes and selection guide as PDF files, alongside the three-dimensional installation view and the datasheet.
Technical Product Information
Click to view enlarged
Feature | Value |
|---|---|
Product type | Tubular earth electrode (earth pipe for earth pits) |
Material | Hot-dip galvanised steel; 304L stainless steel and 316 stainless steel |
Nominal size | 3 inches |
Galvanised pipe section | Outer diameter 83, inner diameter 75 and wall 4 mm |
Stainless steel pipe section | Outer diameter 83, inner diameter 77 and wall 3 mm |
Length | 3000 and 6000 mm (3 and 6 m), in each material |
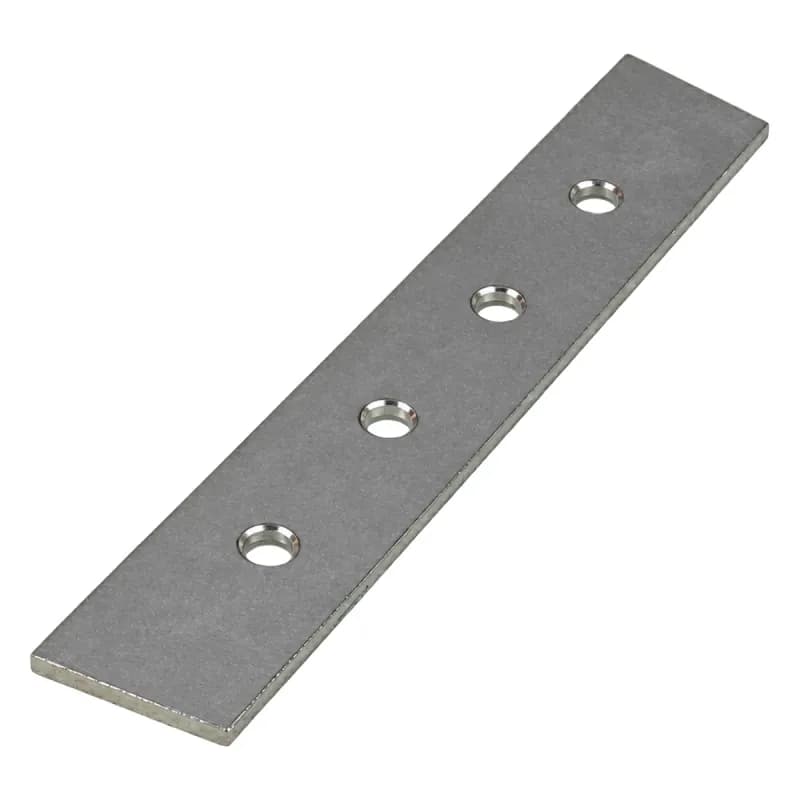
Connection tab | 200 × 40 × 10 mm steel strip, welded tangent to the outer wall at the top end of the pipe with a 50 mm overlap; it projects beyond the open round mouth of the pipe |
Tab holes | Two 12 mm holes for a two-hole copper cable lug |
Galvanised pipe coating | Hot-dip galvanised after machining and welding; zinc coating of at least 610 g/m², equal to 85 microns |
Galvanised pipe weight | 24.9 kg for the 3 m length and 49.2 kg for the 6 m length |
Stainless steel pipe weight | Type 304L: 18.5 kg for the 3 m length and 36.4 kg for the 6 m length; type 316: 18.7 and 36.8 kg |
Conductor connection | Bare copper conductor with a two-hole copper cable lug and stainless steel bolts, nuts and washers on the tab; the joint is wrapped in waterproof insulating tape |
Installation method | Vertical, in a pit 40 to 60 cm in diameter and at least 6 m deep, with GIM ground improvement material in the lower part of the pit and a concrete or polyethylene inspection pit over the top end of the pipe |
Inspection pit earth bar | For this pipe we recommend the tinned copper earth bar |
Order code | HGV 3 and HGV 6 (galvanised); HSL 3 and HSL 6 (304L stainless steel); HSM 3 and HSM 6 (316 stainless steel) |
Earth pipe sizes: dimensions, material, weight and order code
Order code | Material | Nominal size | Outer diameter / inner diameter / wall (mm) | Length L (mm) | Weight (kg) |
|---|---|---|---|---|---|
HGV 3 | Hot-dip galvanised steel | 3 inches | 83 / 75 / 4 | 3000 | 24.9 |
HGV 6 | Hot-dip galvanised steel | 3 inches | 83 / 75 / 4 | 6000 | 49.2 |
HSL 3 | 304L stainless steel | 3 inches | 83 / 77 / 3 | 3000 | 18.5 |
HSL 6 | 304L stainless steel | 3 inches | 83 / 77 / 3 | 6000 | 36.4 |
HSM 3 | 316 stainless steel | 3 inches | 83 / 77 / 3 | 3000 | 18.7 |
HSM 6 | 316 stainless steel | 3 inches | 83 / 77 / 3 | 6000 | 36.8 |
Dimensions are in millimetres. L is the length of the pipe, which stands upright in the pit. The connection tab is a 200 × 40 × 10 mm strip with two 12 mm holes, welded tangent to the outer wall at the top end of the pipe with a 50 mm overlap, projecting beyond the open round mouth of the pipe. Weights are calculated from the drawing dimensions and the density of the steel (7.85 g/cm³ for the galvanised pipe, 7.90 for 304L stainless steel and 8.00 for 316 stainless steel); they include the tab and, for the galvanised pipe, the zinc coating. We keep improving our products and some dimensions may be updated, so please confirm the final dimensions with our specialists before you buy.
Dimensional drawing of the galvanised earth pipe
Download the dimensional drawing (PDF)
Exploded view: pipe, tab and weld
Download the exploded view (PDF)
Material and construction: hot-dip galvanised after welding, and stainless steel
The KALOT Group galvanised earth pipe is a 3-inch steel pipe with a 4 mm wall. On the outer wall at its top end, a connection tab made from 200 × 40 × 10 mm steel strip is welded tangent to the pipe: the tab sits on the pipe with a 50 mm overlap, it is welded around the overlap, and the rest of the tab projects beyond the open round mouth of the pipe. The tab's two 12 mm holes take a two-hole copper cable lug. The pipe is hot-dip galvanised after machining and welding, so the pipe, tab and weld are all under the zinc coating, which is at least 610 g/m², equal to 85 microns. The lower end of the pipe is open. We also offer the earth pipe in 304L and 316 stainless steel, with the same 3-inch nominal size and 83 mm outer diameter, a 3 mm wall and lengths of 3 and 6 m.
Click to view enlarged
Earth pipe applications
- Residential, commercial and office buildings: a building earth pit with an earth pipe, for the electrical installation and the lightning protection system, with an inspectable earth inspection pit beside the building.
- Factories and industrial workshops: the earth electrode for main panels, machinery and equipment, alongside the factory's bonding network.
- Dry ground with a deep moist layer: the top layer of soil dries out in summer, while the pipe and GIM column in a pit at least 6 m deep reach the moist layer.
- Where an earth rod cannot be driven down to a deep moist layer: sandy or collapsing layers at depth make driving an earth rod difficult, so the pit is dug with drilling tools down to the moist layer and the pipe is placed inside.
- Lightning protection systems: the earth electrode for down conductors, alongside any other electrodes the protection system design calls for.
- Small sites with a deep moist layer: a pipe earth pit takes up little space and carries the electrode down to depth at one point, instead of several parallel earth rods.
- Projects whose design calls for a deep earth pit: the technical specifications of these projects require a deep earth pit with a tubular electrode and ground improvement material at the bottom of the pit.
Installation schematic of a pipe earth pit with GIM and an earth inspection pit
Download the execution schematic (PDF)
Connecting the conductor to the earth pipe tab: main method and second method
Download connection modes (PDF)
How to build an earth pit with a galvanised pipe
- Choose the earth pit location: soil that holds its moisture, away from waste, fertiliser and chemicals. Mark the routes of underground services. If you know the soil resistivity, choose the pit design based on it; if not, measure it before the design (measuring soil resistivity). Dig the pit 40 to 60 cm in diameter, for example 50 cm, and at least 6 m deep so that it reaches the moist layer. A hand-dug pit is at least 40 to 50 cm in diameter, and narrower pits are drilled by machine. For a 6 m pipe, the pit depth equals the pipe length plus the GIM bed under it and the space for the inspection pit, so it is more than 6 m, for example about 6.5 m.
- Prepare the GIM mix: mix each bag of GIM with 8 litres of clean water and 2 kg of cement, as set out in the GIM installation guide. Add nothing else, and keep soil, pieces of bag and plastic out of the mix.
- Pour a layer of GIM mix at least 10 cm thick on the pit floor, so that the lower end of the pipe sits at least 10 cm above the floor and inside the GIM.
- Stand the pipe upright in the centre of the pit, tab facing up, on the GIM bed, and hold it centred and plumb with a cross-piece over the pit mouth.
- Pour the GIM mix around the pipe: for a 6 m pipe up to 3 to 4 m from the pit floor, and in the second method with a 3 m pipe, over the whole pipe and up to 15 cm above its top end. A 50 cm pit needs 32 bags for 3 m of GIM, 34 bags for 3.25 m, 37 bags for 3.5 m and 42 bags for 4 m; for other diameters and heights, see the GIM consumption calculator. If you wish, while pouring the mix you can also place a slotted PVC pipe beside the pipe, up into the inspection pit, to water the pit from time to time and keep it moist. This is optional and is used mostly in plate earth pits.
- Fill the rest of the pit with sieved soil and clay, layer by layer with water, and compact it up to the floor level of the earth inspection pit. The top end of the pipe stays just below this level, and the top of the tab stands clear of the soil.
- Place the concrete inspection pit or polyethylene inspection pit over the top end of the pipe and pour concrete around it. The top of the pipe tab sits in the open base of the inspection pit and can be reached from inside. Fasten a short bare copper conductor to the tab with a two-hole copper cable lug and stainless steel bolts, nuts and washers, wrap the joint completely in waterproof insulating tape, and fasten the other end of the conductor to the pit's earth bar with a cable lug and stainless steel bolt. For this pipe we recommend the tinned copper earth bar. Tighten the bolts according to the manufacturer's instructions.
- Run the main conductor from another hole of the earth bar and through the sleeve in the inspection pit wall, bare and in the soil, to the building. Take only the part above ground to the building's earth bar using green and yellow conductor and a wall clamp. Measure the resistance of the earth pit after installation and record it, with the date, in the earthing system file.
Download the installation steps (PDF)
Tools and materials needed
Drilling tools for the pit, a cross-piece to hold the pipe in the centre of the pit, a container and mixer for the GIM mix, clean water and cement, sieved soil and clay, a concrete or polyethylene inspection pit and its tinned copper earth bar, bare copper conductor, two-hole copper cable lugs, stainless steel bolts, nuts and washers, waterproof insulating tape, a cable lug crimping tool, a spanner and an earth resistance tester.
Measuring resistance and inspecting a pipe earth pit
Measure the resistance of the earth pit after installation using the fall-of-potential method (62 percent), and record the result with the date, the season and the soil moisture condition in the earthing system file. Topic 13 of the National Building Regulations of Iran requires measurement after installation and periodic measurements. During periodic inspections, check from inside the earth inspection pit the condition of the insulating tape on the tab, the conductors and the tightness of the connections on the earth bar. If the resistance is above the design value, build a second pit at a distance of about twice the electrode depth (according to Topic 13) and connect the two pits with bare copper conductor. For the measurement method, see the article "How is earth termination resistance measured?"
Choosing length and material, and requesting an earth pipe price
To request an earth pipe price, send our specialists the order code, or the material (hot-dip galvanised steel, 304L stainless steel or 316 stainless steel) and length (3 or 6 m), along with the quantity and the accessories you need (GIM ground improvement material, a concrete or polyethylene inspection pit and its tinned copper earth bar, two-hole copper cable lugs, bare copper conductor and green and yellow conductor). If you also tell us the soil type, the depth of the moist layer and the available space, our specialists at KALOT Group will help you choose the pipe length and material, the pit size, the amount of GIM and the right installation method. For a complete earthing system design, see also earthing system design and calculation.
Click to view enlarged
The resistance of an earth pit is set above all by the soil, the length of the electrode and the depth it reaches. The large diameter of a pipe gives more contact area with the soil and a lower resistance than an earth rod of the same length, but length and depth have a greater effect than diameter, which is why we take the pipe down to the moist layer. On much of the land in Iran, the top layer of soil dries out in summer and becomes highly resistive; in our method the pit is at least 6 m deep so that the pipe and GIM column reach the moist layer. The GIM column at the bottom of the pit becomes part of the electrode, enlarges its contact area with the soil and noticeably lowers the resistance; in the second method, the 3 m pipe sits right in this zone. Most of the cost of a pipe earth pit goes on drilling and GIM, and the pipe itself is the smaller share. An earth pipe does not replace the earth rod on every project: in soft, damp soil with enough space, a galvanised or copper-bonded earth rod is driven and costs less. The earth pipe belongs where the moist layer lies deep, driving an earth rod to that depth is not practical and one large electrode in one pit is needed. In these places our pipe, GIM, earth inspection pit and earth bar make up a complete, inspectable earth pit. We measure the final resistance after installation.
Advantages of the KALOT Group earth pipe
- Large contact area: the pipe's 83 mm outer diameter gives more contact with the soil than an earth rod of the same length and passes current into the ground over a larger surface.
- Reaching the moist layer: the pipe is installed in a pit at least 6 m deep, so the electrode works below the dry top layer, in moist soil.
- GIM column as part of the electrode: GIM ground improvement material in the lower part of the pit, under and around the lower end of the pipe, enlarges the electrode's contact area with the soil.
- Solid construction: a 4 mm wall on the galvanised pipe and 3 mm on the stainless steel pipe, and a 10 mm tab welded to the outer wall at the top end of the pipe. The galvanised pipe is hot-dip galvanised after welding, so the weld is under the zinc coating too.
- Inspectable connections: the conductor connection on the earth bar is inside the earth inspection pit and the tab connection is in its open base; both stay accessible for inspection and measurement.
- Three materials and two lengths: hot-dip galvanised steel or 304L and 316 stainless steel, each in 3 or 6 m lengths, for the main and second installation methods.
- All from KALOT Group: you get the pipe, GIM, concrete or polyethylene inspection pit and its tinned copper earth bar, two-hole copper cable lugs, bare copper conductor and green and yellow earth cable all from us.
- Know the limits too: an earth pipe is not driven, and it needs a drilled pit and more GIM than an earth rod. In soft, damp soil with enough space, we recommend a driven earth rod.
Selection guide: earth pipe or earth rod?
Download the comparison and selection guide (PDF)
Earth pipe, earth rod or copper plate? A technical and financial comparison
Feature | Earth pipe (3 and 6 m) | Galvanised earth rod | Copper-bonded earth rod | Copper plate |
|---|---|---|---|---|
Material | Hot-dip galvanised steel or 304L and 316 stainless steel | Steel with hot-dip galvanised coating | Steel core with copper coating | Solid copper |
KALOT sizes | 3 inches; lengths 3 and 6 m | Diameters of 16 and 20; lengths of 1500 and 2000 | 5/8 and 3/4 inch; length 1500 | 660 × 660 and 660 × 500; thickness 3 and 5 |
Installation | Pit 40 to 60 cm in diameter, at least 6 m deep | Driven; borehole with ground improvement material in hard ground | Driven, with earth rod sections coupled one after another | Drilled pit with GIM |
Suitable moist layer depth | Deep | Shallow | Down to the depth of the coupled sections | Shallow to medium |
Space needed | One pit | Several earth rods, spaced apart | One point | One small pit |
GIM ground improvement material | 50 cm pit: 37 bags for 3.5 m of GIM (6 m pipe) and 34 bags for 3.25 m (3 m pipe) | No GIM when driven | No GIM when driven | 37 bags (660 × 660) and 24 bags (660 × 500) |
Metal weight per electrode (kg) | 24.9 and 49.2 (galvanised); 18.5 to 36.8 (stainless steel) | 2.4 to 5.0 | 2.0 and 2.8 | 8.9 to 19.5 |
Conductor connection | Two-hole copper cable lug on the tab | Clamp | Exothermic welding or clamp | exothermic welding |
Raw metal value per electrode (US dollars) | 14.5 and 28.7 (galvanised) | 1.2 to 2.5 | 3.0 and 3.8 | 130 to 287 |
Metal value index (copper-bonded earth rod, 5/8 inch, 1500 = 1) | 4.8 and 9.6 (galvanised) | 0.4 to 0.8 | 1 and 1.3 | 44 to 96 |
Full installation cost rank (1 = lowest) | 3 | 1 | 2 | 4 |
Recommended use | Dry ground with a deep moist layer; where driving to depth is not practical and one large electrode in one pit is needed | Soft, damp soil with enough space; galvanised earthing networks | Most projects; reaching depth by coupling sections | A hard layer near the surface, tight spaces and projects that specify a plate electrode |
This table was prepared on 21 and 22 Mehr 1405. The raw metal value is calculated from the metal weight of each electrode: zinc and copper at the official London Metal Exchange (LME) price and steel at the global market reference price on those days. This value changes with the day's metal price, and the sale price includes other costs as well. Pipe weights are calculated from the drawing dimensions, the metal value and its index are given for the galvanised pipe, and for the earth rods and copper plate the smaller and larger size of each type are shown. The cost ranking covers the complete installation of one electrode: metal, drilling, GIM and connection. The inspection pit, concrete, conductor to the building and testing are the same for all and are not part of the ranking. The 3 m and 6 m pipes are installed in one pit and share the same cost rank. The resistance of an earth pit is set by the soil and by the length and depth of the electrode, and we measure the final resistance after installation. To learn more, see choosing the right material for an earth electrode and calculating earth termination resistance.
For a complete pipe earth pit, see these products too
Product | When |
|---|---|
Lower part of the pit, under and around the lower end of the pipe: 3 to 4 m for the 6 m pipe, and the whole 3 m pipe plus 15 cm; each bag with 8 litres of water and 2 kg of cement. | |
The lighter ground improvement material of the GIM family, for earth pits. | |
The KALOT GIM, GIM Light and ECO GIM family. | |
The number of GIM bags for your pit diameter and GIM height. | |
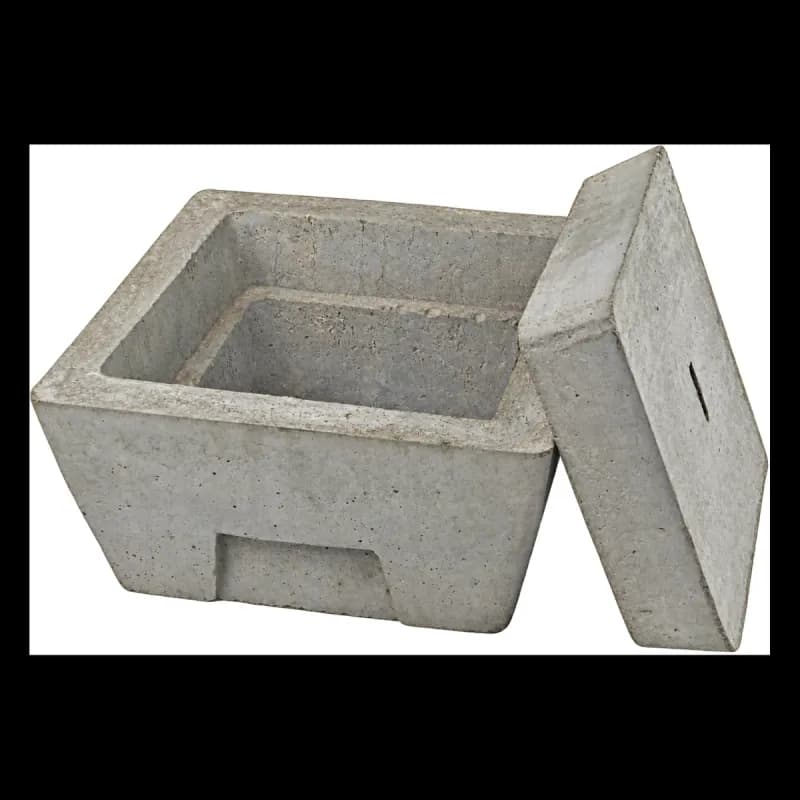
Over the top end of the pipe; the tab connection in its open base stays accessible for inspection and measurement, and concrete is poured around it. | |
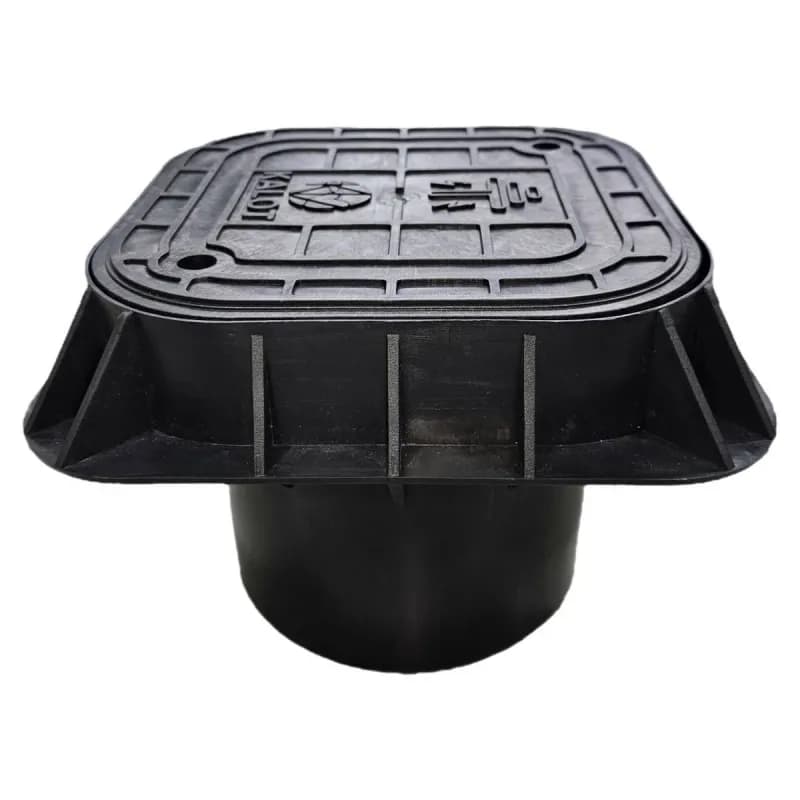
A lightweight inspection pit for the same earth pit; like the concrete one, it sits over the top end of the pipe and concrete is poured around it. | |
All KALOT Group earth inspection pits in one category. | |
For this pipe we recommend the tinned copper earth bar, with the pit conductor and the building conductor each on its own hole. | |
Connects the bare copper conductor to the pipe tab and to the pit's earth bar. | |
The conductor from the tab to the earth bar, and from the inspection pit to the building, in the soil. | |
Only the part above ground, from the foot of the wall to the building's earth bar. | |
Holds the green and yellow earth conductor on the building wall. | |
The building's main earth bar, on insulators, on the wall. | |
For soft, damp soil with enough space; driven without digging. | |
Reaches depth by driving and coupling sections one after another. | |
The other electrode in this category, for a hard layer near the surface and tight spaces. | |
The KALOT Group category of earth pipes and copper earth pit plates. |
To help you understand the requirements for tubular electrodes, we have summarised the key references here. These are design references; the final length, number and depth of the electrodes and the size of the pit are set by the earthing system design and by measurement after installation.
Topic 13 of the National Building Regulations of Iran (1395 edition, Appendix 1) treats the tubular electrode as a type of vertical electrode that is either driven into the ground or buried in a dug pit. Its table of minimum electrode sizes gives, for hot-dip galvanised steel pipe, a 25 mm diameter, a 2 mm wall and a 45 micron coating with both faces of the pipe galvanised, and for stainless steel pipe a 25 mm diameter and a 2 mm wall. The 83 mm diameter and 4 mm wall of our galvanised pipe exceed these minimums, and its zinc coating is at least 85 microns; our stainless steel pipe, with an 83 mm diameter and 3 mm wall, also exceeds the minimum for stainless steel pipe. The same Part requires the earth pit to go down to where the soil's natural moisture is permanent, fills the bottom of the pit to a suitable height with ground improvement material and the rest with a compacted mix of clay and sieved soil, puts the spacing of parallel vertical electrodes at about twice their depth, and requires resistance to be measured after installation and periodically, with a dated file for each electrode.
IEC 60364-5-54:2011 (earthing arrangements and protective conductors) lists buried metal pipe among earth electrodes, alongside the earth rod, wire, tape and plate. In Table 54.1 of this standard, the minimum size for hot-dip galvanised steel pipe is 25 mm diameter with a 2 mm wall and a zinc coating of at least 350 grams per square metre (45 microns), and the coating must be smooth, continuous and free of flux stains; for stainless steel pipe it gives 25 mm diameter and a 2 mm wall. The standard's guidance annex says the resistance of a vertical electrode depends mainly on its length, that an electrode 1 to 2 metres longer should be considered where the soil may dry out or freeze, and that the electrode should sit in the dampest part of the soil. For connections, it accepts exothermic welding, compression joints, clamps or other suitable mechanical connectors installed according to the manufacturer's instructions.
Iranian National Standard 4123 (code of practice for earthing, 1375) uses one resistance formula for the earth rod and the pipe electrode, and points out that changing the pipe diameter has relatively little effect on resistance, so pipe size is chosen mainly for mechanical strength. The same standard asks for parallel electrodes to be spaced at least their own length apart and recommends galvanising steel parts after fabrication; our pipe, too, is hot-dip galvanised after the lug is welded on.
IEEE Std 142-2007 (earthing of industrial and commercial power systems) regards electrode diameter as having little effect and length and installation depth as more effective. It explains that because soil resistivity usually falls with depth and rising moisture, a few deep electrodes perform better than many short ones.
IEC 62561-2 (lightning protection system components: conductors and earth electrodes), in its 2018 edition and 2019 amendment, places galvanised steel pipe in the earth rod group and applies the earth rod tests to it, including coating thickness measurement. The 2025 edition of this standard has replaced the 2018 edition.
IEC 62305-3:2024 (protection of structures against lightning, replacing the 2010 edition) describes earth electrode arrangements for lightning protection systems and refers to the IEC 62561 series for their components.
Three-dimensional view of a pipe earth pit installation
Documents & Downloads
Catalogues & datasheets
Drawings & schematics
- Dimensional drawing of the galvanised earth pipeLanguage: Persian (opens in a new tab)
- Galvanised earth pipe exploded viewLanguage: Persian (opens in a new tab)
- Galvanised earth pipe installation schematicLanguage: Persian (opens in a new tab)
- Galvanised earth pipe connection modesLanguage: Persian (opens in a new tab)
- Galvanised earth pipe installation stepsLanguage: Persian (opens in a new tab)
- Galvanised earth pipe comparison and selection guideLanguage: Persian (opens in a new tab)
Frequently Asked Questions
What is an earth pipe and what is it used for?
An earth pipe is a tubular earth electrode installed upright in a deep earth pit. It carries fault current and lightning current down to the moist layer of the soil. We offer it in hot-dip galvanised steel and in 304L and 316 stainless steel, with a nominal size of 3 inches and in lengths of 3 and 6 m. Earth pipes serve buildings, factories and lightning protection systems, especially where the top layer of soil is dry, the moisture lies deep and driving an earth rod to that depth is not practical.
What are the size, dimensions and weight of the KALOT earth pipe?
Our galvanised earth pipe has a nominal size of 3 inches: outer diameter 83, inner diameter 75 and wall 4 mm, in two lengths, 3000 and 6000 mm. The connection tab is a 200 × 40 × 10 mm steel strip with two 12 mm holes. It is welded tangent to the outer wall at the top end of the pipe with a 50 mm overlap, and it projects beyond the open round mouth of the pipe. The 3 m galvanised pipe weighs 24.9 kg and the 6 m pipe 49.2 kg, with order codes HGV 3 and HGV 6. The stainless steel pipe has the same 83 mm outer diameter with a 3 mm wall. The 3 m and 6 m stainless steel pipes weigh 18.5 and 36.4 kg in 304L, and 18.7 and 36.8 kg in 316. These weights are calculated from the drawing dimensions and the density of the steel.
Do you also offer a stainless steel earth pipe?
Yes. We also offer the earth pipe in 304L and 316 stainless steel, with a nominal size of 3 inches, an 83 mm outer diameter and a 3 mm wall, in lengths of 3 and 6 m. The order codes for the 3 and 6 m lengths are HSL 3 and HSL 6 for 304L, and HSM 3 and HSM 6 for 316. The choice between galvanised and stainless steel, and between 304L and 316, depends on your earthing system design and the other parts of your network. Our specialists are happy to help you decide.
Which is better, an earth pipe or an earth rod?
The earth pipe is meant for sites where the moist layer lies deep and driving an earth rod to that depth is not practical. In soft, damp soil with enough space, a galvanised earth rod or a copper-bonded earth rod is driven without digging and costs less. The earth pipe needs a drilled pit and GIM, and it creates a large electrode in the moist layer from a single pit. The comparison table on this page sets these electrodes side by side in technical and financial terms. In a pipe earth pit, the depth and the GIM column affect the resistance more than the pipe diameter does, and we measure the final value after installation.
How deep should a pipe earth pit be?
In our method, a pipe earth pit is at least 6 m deep and 40 to 60 cm in diameter, so that the pipe and the GIM column reach the moist layer of the soil. A hand-dug pit is at least 40 to 50 cm in diameter, and narrower pits are drilled by machine. Topic 13 of the National Building Regulations of Iran requires the earth pit to be dug down to where the soil's natural moisture is permanent; on dry land this depth is greater. For a 6 m pipe the pit goes deeper than 6 m, for example about 6.5 m, to include the GIM bed under the pipe and the space for the inspection pit. The final depth is set by the earthing system design and by measurement after installation.
How is an earth pit built with a pipe?
In our main method, a pit 40 to 60 cm in diameter and at least 6 m deep is dug; for a 6 m pipe, the pit goes deeper than 6 m by the height of the GIM bed under the pipe and the space for the inspection pit. A layer of GIM at least 10 cm thick is poured on the pit floor. The 6 m pipe stands upright in the centre of the pit on this bed, with the tab facing up, and GIM is poured around it up to 3 to 4 m from the pit floor. The rest of the pit is filled with sieved soil and clay, layer by layer with water, and compacted up to the floor level of the concrete or polyethylene inspection pit. The top end of the pipe stays just below the inspection pit floor, and the top of the tab sits in its open base. Inside the inspection pit, a short bare copper conductor with a two-hole copper cable lug connects the tab to the pit's earth bar, and the main conductor runs from the inspection pit to the building. For this pipe we recommend the tinned copper earth bar. You can see the eight steps of this method in the "Application and installation" tab and in the installation steps drawing.
How is a 3 m pipe installed in a 6 m pit?
This is our second installation method. Above ground, we fasten the two-hole copper cable lug of a bare copper conductor to the pipe tab with stainless steel bolts and nuts, and wrap the joint completely in waterproof insulating tape. We then lower the pipe, tab up and hanging from this same conductor, to the bottom of the pit onto a GIM bed at least 10 cm thick, and hold it in the centre with a cross-piece over the pit mouth while the GIM and soil are poured around it. The GIM covers the whole pipe and 15 cm above its top end. The conductor comes up through the pit and, inside the earth inspection pit, is fastened with a cable lug to the pit's tinned copper earth bar. The building conductor takes another hole on the same bar.
How many bags of GIM does a pipe earth pit need?
The number of bags depends on the pit diameter and the height of the GIM. For a 6 m pipe, GIM is poured up to 3 to 4 m from the pit floor; for a 3 m pipe in the second method, it covers the whole pipe and 15 cm above it, which comes to 3.25 m with the 10 cm bed under the pipe. For 3, 3.25, 3.5 and 4 m of GIM, a 40 cm pit needs 20, 22, 24 and 27 bags, a 50 cm pit needs 32, 34, 37 and 42 bags, and a 60 cm pit needs 45, 49, 53 and 60 bags of 15 kg each. For other diameters and heights, see the GIM consumption calculator. According to the GIM installation guide, each bag is mixed with 8 litres of clean water and 2 kg of cement, and in a pipe earth pit this mix is poured from the top of the pit around the pipe.
What should we fill around the earth pipe with: salt and charcoal, or GIM?
In our method, instead of salt and charcoal, the lower part of the pit, under and around the lower end of the pipe, is filled with GIM ground improvement material. The rest of the pit is filled with sieved soil and clay, layer by layer with water, and compacted. The GIM column becomes part of the electrode and enlarges its contact area with the soil. Choose the type and quantity of GIM using our ground improvement materials and the GIM consumption calculator.
How do we connect the earth conductor to the earth pipe?
Fasten the bare copper conductor to the pipe tab with a two-hole copper cable lug and stainless steel bolts, nuts and washers, then wrap the joint completely in waterproof insulating tape. Inside the earth inspection pit, the other end of the conductor is fastened with a cable lug and a stainless steel bolt to the pit's earth bar, and the building conductor sits on another hole of the bar. For this pipe we recommend the tinned copper earth bar. The conductor stays bare in the soil and inside the inspection pit, and only the part above ground, up to the building's earth bar, is green and yellow. Tighten the bolts according to the manufacturer's instructions.
What is the difference between an earth pipe and the plastic watering pipe (charging pipe) of an earth pit?
The earth pipe is itself the earth electrode: a steel pipe that carries current into the soil, with the earth conductor connected to its tab. A plastic watering pipe, also called a charging pipe, is a perforated plastic pipe used only to bring water to the bottom of the pit, and it is not an electrode. Topic 13 of the National Building Regulations of Iran provides for a watering pipe where permanent soil moisture is not assured, and allows watering of an earth pit only when it is continuous.
What is the standard for a galvanised earth pipe?
Topic 13 of the National Building Regulations of Iran (1395 edition) sets the minimum size of a hot-dip galvanised steel pipe for an earth electrode at 25 mm diameter, 2 mm wall and a 45 micron coating. IEC 60364-5-54:2011 gives the same diameter and wall with a zinc coating of at least 350 g/m². IEC 62561-2:2018 (with its 2019 amendment) lists galvanised steel pipe in the earth rod group. The 83 mm diameter and 4 mm wall of our galvanised pipe exceed these minimums, and its zinc coating is at least 610 g/m². You will find a summary of these references in the "Standards" tab.
What does the price of an earth pipe depend on?
The price of an earth pipe depends above all on the weight of the steel and its zinc coating, and on the day's metal prices. So the material, length, welded tab, hot-dip galvanising after welding and quantity set the price. In a complete installation, most of the cost of a pipe earth pit goes on drilling and GIM, and the pipe itself is the smaller share. For today's price, send our specialists the order code, or the material and length, along with the quantity and the accessories you need.
Have a Technical Question?
KALOT Group's technical experts are ready to answer your questions about lightning rods and earthing systems.